state的改变完全由mutations控制, 我们也没必要任何项目都使用vuex,对于中大型复杂项目而言,需要共享的状态很多时,使用vuex才是最佳的选择。接下来我将详细介绍各api的概念和作用。
- state 单一状态树,用一个对象就包含了全部的应用层级状态,并且作为一个唯一数据源而存在
- getters 就像计算属性一样,getter 的返回值会根据它的依赖被缓存起来,且只有当它的依赖值发生了改变才会被重新计算 比如如下案例:
const store = new Vuex.Store({
  state: {
    todos: [
      { id: 1, text: '...', done: true },
      { id: 2, text: '...', done: false }
    ]
  },
  getters: {
    doneTodos: state => {
      return state.todos.filter(todo => todo.done)
    }
  }
})
// 访问getters里的属性
this.$store.getters.doneTodos
复制代码
- Mutation 更改 Vuex 的 store 中的状态的唯一方法,使用案例如下:
const store = new Vuex.Store({
  state: {
    num: 1
  },
  mutations: {
    add (state) {
      // 变更状态
      state.num
    }
  }
})

// 在项目中使用mutation
store.commit('add')
// 添加额外参数
store.commit('add', 10)
复制代码
- Action Action提交的是mutation,而不是直接变更状态,可以包含任意异步操作,具体用法如下:
const store = new Vuex.Store({
  state: {
    num: 0
  },
  mutations: {
    add (state) {
      state.num
    }
  },
  actions: {
    add (context) {
      context.commit('add')
    },
    asyncAdd ({ commit }) {
    setTimeout(() => {
      commit('add')
    }
  }
})
// 分发action
store.dispatch('add')
// 异步action
store.dispatch('asyncAdd')
// 异步传参
store.dispatch('asyncAdd', { num: 10 })
- Module 将store分割成模块(module)。每个模块拥有自己的 state、mutation、action、getter、甚至是嵌套子模块
笔者更具实际经验总结了一套标准使用模式,就拿笔者之前的开源XPXMS举例,如下:

store目录是用来组织vuex代码用的,我将action,mutation,state分文件管理,这样项目大了之后也很容易管理和查询。接下来看看是如何组织的:
// type.ts
// 用来定义state等的类型文件
export interface State {
    name: string;
    isLogin: boolean;
    config: Config;
    [propName: string]: any;  // 用来定义可选的额外属性
}

export interface Config {
    header: HeaderType,
    banner: Banner,
    bannerSider: BannerSider,
    supportPay: SupportPay
}

export interface Response {
    [propName: string]: any;
}

// state.ts
// 定义全局状态
import { State } from './type'
export const state: State = {
    name: '',
    isLogin: false,
    curScreen: '0', // 0为pc, 1为移动
    config: {
        header: {
            columns: ['首页', '产品', '技术', '运营', '商业'],
            height: '50',
            backgroundColor: '#000000',
            logo: ''
        }
    },
    // ...
    articleDetail: null
};

// mutation.ts
import {
    State,
    Config,
    HeaderType,
    Banner,
    BannerSider,
    SupportPay
} from './type'

export default {
    // 预览模式
    setScreen(state: State, payload: string) {
        state.curScreen = payload;
    },

    // 删除banner图
    delBanner(state: State, payload: number) {
        state.config.banner.bannerList.splice(payload, 1);
    },

    // 添加banner图
    addBanner(state: State, payload: object) {
        state.config.banner.bannerList.push(payload);
    },

    // ...
};

// action.ts
import {
    HeaderType,
    Response
 } from './type'
import http from '../utils/http'
import { uuid, formatTime } from '../utils/common'
import { message } from 'ant-design-vue'

export default {
    /**配置 */
    setConfig(context: any, paylod: HeaderType) {
        http.get('/config/all').then((res:Response) => {
            context.commit('setConfig', res.data)
        }).catch((err:any) => {
            message.error(err.data)
        })
    },
    /**header */
    saveHeader(context: any, paylod: HeaderType) {
        http.post('/config/setHeader', paylod).then((res:Response) => {
            message.success(res.data)
            context.commit('saveHeader', paylod)
        }).catch((err:any) => {
            message.error(err.data)
        })
    },
    // ...
};

// index.ts
import Vue from 'vue';
import Vuex from 'vuex';
import { state } from './state';
import mutations from './mutation';
import actions from './action';

Vue.use(Vuex);

export default new Vuex.Store({
  state,
  mutations,
  actions
});

// main.ts
// 最后挂载到入口文件的vue实例上
import Vue from 'vue';
import App from './App.vue';
import router from './router';
import store from './store/';
import './component-class-hooks';
import './registerServiceWorker';

Vue.config.productionTip = false;

new Vue({
  router,
  store,
  render: (h) => h(App),
}).$mount('#app');
我们在实际项目中都可以使用这种方式组织管理vuex相关的代码。
「1.7 vue-router基本使用模式和导航钩子的用法及作用」vue-router使用大家想必不是很陌生,这里直接写一个案例:
// router.ts
import Vue from 'vue';
import Router from 'vue-router';
import Home from './views/admin/Home.vue';

Vue.use(Router);

const router =  new Router({
  mode: 'history',
  base: process.env.BASE_URL,
  routes: [
    {
      path: '/',
      component: Home,
      beforeEnter: (to, from, next) => {
        next();
      },
      children: [
        {
          // 当 /user/:id/profile 匹配成功,
          // UserProfile 会被渲染在 User 的 <router-view> 中
          path: '',
          name: 'header',
          component: () => import(/* webpackChunkName: "header" */ './views/admin/subpage/Header.vue'),
        },

        {
          path: '/banner',
          name: 'banner',
          component: () => import(/* webpackChunkName: "banner" */ './views/admin/subpage/Banner.vue'),
        },
        {
          path: '/admin',
          name: 'admin',
          component: () => import(/* webpackChunkName: "admin" */ './views/admin/Admin.vue'),
        },
      ],
    },
    {
      path: '/login',
      name: 'login',
      component: () => import(/* webpackChunkName: "login" */ './views/Login.vue'),
      meta:{
        keepAlive:false //不需要被缓存的组件
      }
    },
    {
      path: '*',
      name: '404',
      component: () => import(/* webpackChunkName: "404" */ './views/404.vue'),
    },
  ],
});

// 路由导航钩子的用法
router.beforeEach((to, from, next) => {
  if(from.path.indexOf('/preview') < 0) {
    sessionStorage.setItem('prevToPreviewPath', from.path);
  }
  next();
})

export default router
以上案例是很典型的静态路由配置和导航钩子的用法(如何加载路由组件,动态加载路由组件,404页面路由配置,路由导航钩子使用)。如果在做后台系统,往往会涉及到权限系统,所以一般会采用动态配置路由,通过前后端约定的路由方式,路由配置文件更具不同用户的权限由后端处理后返。由于设计细节比较繁琐,涉及到前后端协定,所以这里只讲思路就好了。
1.8 vue中检测变化的注意事项受现代 JavaScript 的限制,Vue 无法检测到对象属性的添加或删除。由于 Vue 会在初始化实例时对属性执行 getter/setter 转化,所以属性必须在 data 对象上存在才能让 Vue 将它转换为响应式的。还有一种情况是,vue无法检测到data属性值为数组或对象的修改,所以我们需要用原对象与要混合进去的对象的属性一起创建一个新的对象。可以使用this.$set或者对象的深拷贝,如果是数组则可以使用splice,扩展运算符等方法来更新。
1.9 对指定页面使用keep-alive路由缓存keep-alive是Vue的内置组件,能在组件切换过程中将状态保留在内存中,防止重复渲染DOM。我们可以使用以下方式设置某些页面是否被缓存:
- 通过路由配置文件和router-view设置:
// routes 配置
export default [
  {
    path: '/A',
    name: 'A',
    component: A,
    meta: {
      keepAlive: true // 需要被缓存
    }
  }, {
    path: '/B',
    name: 'B',
    component: B,
    meta: {
      keepAlive: false // 不需要被缓存
    }
  }
]
路由视图配置:
// 路由设置
<keep-alive>
    <router-view v-if="$route.meta.keepAlive">
        <!-- 会被缓存的视图组件-->
    </router-view>
</keep-alive>

<router-view v-if="!$route.meta.keepAlive">
    <!-- 不需要缓存的视图组件-->
</router-view>
- 通过router-view的key属性 具体方式如下:
<template>
  <div id="app">
    <keep-alive>
      <router-view :key="key" />
    </keep-alive>
  </div>
</template>

<script lang="ts">
import { Vue } from 'vue-property-decorator';
import Component from 'vue-class-component';
@Component
export default class App extends Vue {
  get key() {
    // 缓存除预览和登陆页面之外的其他页面
    console.log(this.$route.path)
    if(this.$route.path.indexOf('/preview') > -1) {
      return '0'
    }else if(this.$route.path === '/login') {
      return '1'
    }else {
      return '2'
    }
  }
}
</script>
1.10 vue常用工具函数总结
总结一下笔者在vue项目中的常用的工具函数。
- 识别ie浏览器
/**
 * 识别ie--浅识别
 */
export const isIe = () => {
    let explorer = window.navigator.userAgent;
        //判断是否为IE浏览器
    if (explorer.indexOf("MSIE") >= 0) {
        return true;
    }else {
        return false
    }
}
- 颜色16进制转rgba
/**
 * 颜色转换16进制转rgba
 * @param {String} hex
 * @param {Number} opacity
 */
export function hex2Rgba(hex, opacity) {
	if(!hex) hex = "#2c4dae";
    return "rgba("   parseInt("0x"   hex.slice(1, 3))   ","   parseInt("0x"   hex.slice(3, 5))   ","   parseInt("0x"   hex.slice(5, 7))   ","   (opacity || "1")   ")";
}
- 去除html标签
// 去除html标签
export const htmlSafeStr = (str) => {
    return str.replace(/<[^>] >/g, "")
}
- 获取url参数对象
/* 获取url参数 */
export const getQueryString = () => {
    let qs = location.href.split('?')[1] || '',
        args = {},
        items = qs.length ? qs.split("&") : [];
        items.forEach((item,i) => {
            let arr = item.split('='),
                name = decodeURIComponent(arr[0]),
                value = decodeURIComponent(arr[1]);
                name.length && (args[name] = value)
        })
    return args;
}
- 解析url参数
/* 解析url参数 */
export const paramsToStringify = (params) => {
    if(params){
        let query = [];
        for(let key in params){
            query.push(`${key}=${params[key]}`)
        }
        return `${query.join('&')}`
    }else{
        return ''
    }
}
- 将数据转化为数组
export const toArray = (data) => {
    return Array.isArray(data) ? data : [data]
}
- 带参数跳转url(hash模式)
/**
 *  带参数跳转url(hash模式)
 * @param {String} url
 * @param {Object} params
 */
export const toPage = (url, params) => {
    if(params){
        let query = [];
        for(let key in params){
            query.push(`${key}=${params[key]}`)
        }
        window.location.href = `./index.html#/${url}?${query.join('&')}`;
    }else{
        window.location.href = `./index.html#/${url}`;
    }
}
- 控制字符串显示,超出指定字数则显示省略号
/**
 * 指定字符串 溢出显示省略号
 * @param {String} str
 * @param {Number} num
 */
export const getSubStringSum = (str = "", num = 1) => {
    let newStr;
    if(str){
        str = str   '';
        if (str.trim().length > num ) {
            newStr = str.trim().substring(0, num)   "...";
        } else {
            newStr = str.trim();
        }
    }else{
        newStr = ''
    }
    return newStr;
}
- 生成uuid
/**
 * 生成uuid
 * @param {number} len 生成指定长度的uuid
 * @param {number} radix uuid进制数
 */
export function uuid(len, radix) {
    let chars = '0123456789ABCDEFGHIJKLMNOPQRSTUVWXYZabcdefghijklmnopqrstuvwxyz'.split('');
    let uuid = [], i;
    radix = radix || chars.length;

    if (len) {
      for (i = 0; i < len; i  ) uuid[i] = chars[0 | Math.random()*radix];
    } else {
      let r;

      uuid[8] = uuid[13] = uuid[18] = uuid[23] = '-';
      uuid[14] = '4';

      for (i = 0; i < 36; i  ) {
        if (!uuid[i]) {
          r = 0 | Math.random()*16;
          uuid[i] = chars[(i == 19) ? (r & 0x3) | 0x8 : r];
        }
      }
    }

    return uuid.join('');
}
- 生成指定格式的时间字符串
/**
 * 生成指定格式的时间
 * @param {*} timeStemp 时间戳
 * @param {*} flag 格式符号
 */
export function formatTime(timeStemp, flag) {
    let time = new Date(timeStemp);
    let timeArr = [time.getFullYear(), time.getMonth()   1, time.getDate()];
    return timeArr.join(flag || '/')
}
1.11 如何基于axios二次封装一个具有请求/响应拦截的http请求
这个主要是对axios的理解,大家可以学习axios官方文档,这里给出一个二次封装的模版:
import axios from 'axios'
import qs from 'qs'

// 请求拦截
axios.interceptors.request.use(config => {
  // 此处可以封装一些加载状态
  return config
}, error => {
  return Promise.reject(error)
})

// 响应拦截
axios.interceptors.response.use(response => {
  return response
}, error => {
  return Promise.resolve(error.response)
})

function checkStatus (response) {
  // 此处可以封装一些加载状态
  // 如果http状态码正常,则直接返回数据
  if(response) {
    if (response.status === 200 || response.status === 304) {
      return response.data
      // 如果不需要除了data之外的数据,可以直接 return response.data
    } else if (response.status === 401) {
      location.href = '/login';
    } else {
      throw response.data
    }
  } else {
    throw {data:'网络错误'}
  }

}

// axios默认参数配置
axios.defaults.baseURL = '/api/v0';
axios.defaults.timeout = 10000;

// restful API封装
export default {
  post (url, data) {
    return axios({
      method: 'post',
      url,
      data: qs.stringify(data),
      headers: {
        'X-Requested-With': 'XMLHttpRequest',
        'Content-Type': 'application/x-www-form-urlencoded; charset=UTF-8'
      }
    }).then(
      (res) => {
        return checkStatus(res)
      }
    )
  },
  get (url, params) {
    return axios({
      method: 'get',
      url,
      params, // get 请求时带的参数
      headers: {
        'X-Requested-With': 'XMLHttpRequest'
      }
    }).then(
      (res) => {
        return checkStatus(res)
      }
    )
  },
  del (url, params) {
    return axios({
      method: 'delete',
      url,
      params, // get 请求时带的参数
      headers: {
        'X-Requested-With': 'XMLHttpRequest'
      }
    }).then(
      (res) => {
        return checkStatus(res)
      }
    )
  }
}
该模版只是一个大致框架,大家可以细化成业务需求的样子,该案例提供了restful接口方法,比如get/post/delete/put等。
1.12 vue常用社区组件,插件笔者在做vue项目时为了提高开发效率也会直接用第三方插件,下面整理一下常用的vue社区组件和库。
- UI框架
- elementUI
- iview
- Mint UI 基于 Vue.js 的移动端组件库
- Vant 有赞团队的移动端组件库
- 社区组件
- Vuetable-2 基于vue的强大的表格组件
- vue-fa 基于vue的图标组件库
- vue-notification vue优美的信息通知组件
- vue-progress-path vue个性的路径进度条组件
- Vue树组件,可让您以美观和逻辑的方式呈现层次结构的数据
- vue-social-sharing vue社区分享组件
- vue-qrcode-reader 一组用于检测和解码二维码的Vue.js组件
- vue-clipboard2 基于vue的剪切板组件
- cool-emoji-picker vue表情包组件
- Vue-tabs-component 强大而美观的tab组件
更多组件可以在vue插件社区查看。
2. vue项目配置经验总结在讲完vue项目经验之后,为了让大家能独立负责一个项目,我们还需要知道从0开始搭建项目的步骤,以及通过项目实际情况,自己配置一个符合的项目框架,比如有些公司会采用vue element vue less搭建,有些公司采用vue iview vue sass,或者其他更多的技术栈,所以我们要有把控能力,我们需要熟悉webpack或者vue-cli3脚手架的配置,笔者之前有些过详细的webpack和vue-cli3搭建自定义项目的文章,这里由于篇幅有限就不一一举例了。感兴趣的朋友可以参考以下两篇文章:
- 一张图教你快速玩转vue-cli3
- 用 webpack 4.0 撸单页/多页脚手架 (jquery, react, vue, typescript)
❝
组件系统是 Vue 的另一个重要概念,因为它是一种抽象,允许我们使用小型、独立和通常可复用的组件构建大型应用。几乎任意类型的应用界面都可以抽象为一个组件树。在一个大型应用中,有必要将整个应用程序划分为组件,以使开发更易管理。
❞
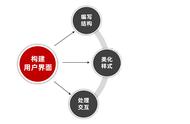
对于一个基础组件来说,我们该如何下手去设计呢?首先笔者觉得应该先从需求和功能入手,先划分好组件的功能边界,组件能做什么,理清这些之后再开始写组件。

如上图组件的一个抽象,我们无论如何记住的第一步就是先理清需求在去着手开发,这样可以避免大量效率的丢失。在上图中我们要注意组件的解耦合,每个组件都负责特定的功能或者展现,这样对组件后期维护性和扩展性有非常大的帮助。笔者总结了一下组件设计的注意事项:
- 确定组件设计的边界和功能定位
- 组件尽量遵循单一职责原理,用组合代替功能的杂糅
- 组件属性暴露要适度,不可过渡暴露属性
- 组件封装要考虑可重用,可组合,可配置
- 做好组件类型设计的划分(展示型组件,录入型组件,基础组件, 布局组件,反馈型组件,业务组件等)
笔者拿之前在开源社区发布的一个文件上传组件为例子来说明举例,代码如下:
<template>
    <div>
        <a-upload
            :action="action"
            listType="picture-card"
            :fileList="fileList"
            @preview="handlePreview"
            @change="handleChange"
            :remove="delFile"
            :data="data"
            >
            <template v-if="!fileList.length && defaultValue">
                <img :src="defaultValue" alt="" style="width: 100%">
            </template>
            <template v-else>
                <div v-if="fileList.length < 2">
                    <a-icon type="plus" />
                    <div class="ant-upload-text">上传</div>
                </div>
            </template>
        </a-upload>
        <a-modal :visible="previewVisible" :footer="null" @cancel="handleCancel">
            <img alt="example" style="width: 100%" :src="previewImage" />
        </a-modal>
    </div>
</template>

<script lang="ts">
import { Component, Vue, Prop } from 'vue-property-decorator';
@Component
export default class Upload extends Vue {
  @Prop({ default: 'https://www.mocky.io/v2/5cc8019d300000980a055e76' })
  action!: string;

  @Prop()
  defaultValue: string;

  @Prop()
  data: object;

  @Prop({ default: function() {} })
  onFileDel: any;

  @Prop({ default: function() {} })
  onFileChange: any;

  public previewVisible: boolean =  false;
  public previewImage: string =  '';
  public fileList: object[] = [];

  // 预览图片
  public handlePreview(file: any) {
    this.previewImage = file.url || file.thumbUrl;
    this.previewVisible = true;
  }

  // 删除文件和回调
  public delFile(file: any) {
    this.fileList = [];
    this.onFileDel();
  }

  // 文件上传变化的处理函数
  public handleChange({ file }: any) {
    this.fileList = [file];
    if(file.status === 'done') {
      this.onFileChange(file.response.url);
    } else if(file.status === 'error') {
      this.$message.error(file.response.msg)
    }
  }
  // 取消预览
  public handleCancel() {
      this.previewVisible = false;
  }
}
</script>
以上文件上传预览采用的是ts来实现,但设计思路都是一致的,大家可以参考交流一下。 关于如何设计一个健壮的组件,笔者也写过相关文章,大致思想都好似一样的,可以参考一下:
- 《精通react/vue组件设计》之快速实现一个可定制的进度条组件
- 《精通react/vue组件设计》之用纯css打造类materialUI的按钮点击动画并封装成react组件
- 3分钟教你用原生js实现具有进度监听的文件上传预览组件
组件的设计思想和方法与具体框架无关,所以组件设计的核心是方法论,我们只有在项目中不断总结和抽象,才能对组件设计有更深刻的理解。
4. vue项目架构与服务化探索这里是笔者总结的一套思维导图:

有点微前端架构的感觉,但是还有很多细节需要考虑。此架构适用于不同子系统独立部署和开发的环境, 也不需要考虑具体的技术栈选择,相同的框架采用同一套自建组件库来达到组件的复用,这里提倡项目开始设计时就考虑组件化和模块化,做出功能的最大的拆分和去耦合。笔者后面会单独花时间总结微前端架构具体的一些设计思路和落地方案,感兴趣的可以一起探讨交流。
,