⼀、环境准备[root@localhost library]# cat /etc/redhat-release //查看内核版本CentOS Linux release 7.3.1611 (Core)[root@localhost library]#
1 在开始安装前建议关闭SELinux或将其设置为disabled,最好建议永久关闭SELinux
# sed -i 's/^SELINUX=.*/SELINUX=disabled/g' /etc/selinux/config
2 重启系统:reboot ,重启完成后查看SELinux
[root@localhost library]# /usr/sbin/sestatus -vSELinux status: disabled[root@localhost library]#
3 查看防⽕墙状态,以及关闭防⽕墙
# firewall-cmd —-state
关闭防⽕墙及关闭开机启动防⽕墙:直接关闭防⽕墙# systemctl stop firewalld.service禁⽌firewall开机启动# systemctl disable firewalld.service
⼆、安装Apache服务器 1 安装
# yum -y install httpd httpd-devel
2 设置开机启动并且启动Apache服务
# systemctl enable httpd# systemctl start httpd
3 启动后浏览器输⼊本机ip,可以看到Apache主⻚
三 、 安装MariaDB1 安装
# yum install -y mariadb-server mariadb
2 设置MariaDB开机启动和启动MariaDB服务
# systemctl start mariadb
# systemctl enable mariadb
3 查看MariaDB状态,running已经运⾏
# systemctl status mariadb
4 初始设置MariaDB,设置root密码
出于安全考虑,考虑删除匿名⽤户和禁⽤远程根登录,参⻅下⾯的示例配置
[root@localhost ~]# mysql_secure_installation
NOTE: RUNNING ALL PARTS OF THIS SCRIPT IS RECOMMENDED FOR ALL MariaDB SERVERS IN PRODUCTION USE! PLEASE READ EACH STEP CAREFULLY!
In order to log into MariaDB to secure it, we'll need the currentpassword for the root user. If you've just installed MariaDB, andyou haven't set the root password yet, the password will be blank,so you should just press enter here.
Enter current password for root (enter for none):OK, Successfully used password, moving on...
Setting the root password ensures that nobody can log into the MariaDBroot user without the proper authorisation.
Set root password? [Y/n] yNew password:Re-enter new password:Password updated successfully!Reloading privilege tables..... Success!
By default, a MariaDB installation has an anonymous user, allowing anyoneto log into MariaDB without having to have a user account created forthem. This is intended only for testing, and to make the installationgo a bit smoother. You should remove them before moving into aproduction environment.
Remove anonymous users? [Y/n] y... Success!
Normally, root should only be allowed to connect from 'localhost'. Thisensures that someone cannot guess at the root password from the network.
Disallow root login remotely? [Y/n] y... Success!
By default, MariaDB comes with a database named 'test' that anyone canaccess. This is also intended only for testing, and should be removedbefore moving into a production environment.
Remove test database and access to it? [Y/n] y- Dropping test database...... Success!- Removing privileges on test database...... Success!
Reloading the privilege tables will ensure that all changes made so farwill take effect immediately.
Reload privilege tables now? [Y/n] y... Success!
Cleaning up...
All done! If you've completed all of the above steps, your MariaDBinstallation should now be secure.
Thanks for using MariaDB!
5 创建Radius数据库和⽤户名密码
[root@localhost ~]# mysql -u root -pEnter password:Welcome to the MariaDB monitor. Commands end with ; or \g.Your MariaDB connection id is 11Server version: 5.5.68-MariaDB MariaDB Server
Copyright (c) 2000, 2018, Oracle, MariaDB Corporation Ab and others.
Type 'help;' or '\h' for help. Type '\c' to clear the current input statement.
MariaDB [(none)]> CREATE DATABASE radius;Query OK, 1 row affected (0.00 sec)
MariaDB [(none)]> GRANT ALL ON radius.* TO radius@localhost IDENTIFIED BY "radius";Query OK, 0 rows affected (0.00 sec)
MariaDB [(none)]> FLUSH PRIVILEGES;Query OK, 0 rows affected (0.00 sec)
MariaDB [(none)]> exitBye[root@localhost ~]#
四 、 安装php
1 修改yum源
# yum install epel-release -y# rpm -Uvh https://mirror.webtatic.com/yum/el7/webtatic-release.rpm
2 清除历史版本为了防⽌冲突
# yum -y remove php*
3 安装拓展包
# yum -y install php72w php72w-cli php72w-fpm php72w-common php72w-devel php72w-embedded php72w-gd php72w-mbstring php72w-mysqlnd php72w-opcache php72w-pdo php72w-xml
如果出现卡的请求ctrl c 推出后重新执⾏命令
4 查看php的版本
# php -v
5 测试php
Apache⽹站跟⽬录下新建info.php⽹⻚,按Ins输⼊内容后按esc,:wq 保存退出
# vi /var/www/html/info.php
填⼊以下测试内容:<?php phpinfo(); ?>
6 重启Apache服务器,浏览器输⼊php测试⻚
# systemctl restart httpd.service
浏览器输⼊:http://192.168.0.107/info.php
五、安装FreeRadius
1 安装
# yum -y install freeradius freeradius-utils freeradius-mysql
2 启动且设置为开机⾃启
3 配置Freeradius连接MariaDB数据
#mysql -u root -p radius < /etc/raddb/mods-config/sql/main/mysql/schema.sql
1
4 修改FreeRadius配置⽂件
# vi /etc/raddb/mods-available/sql 修改为如下图所示
# chgrp -h radiusd /etc/raddb/mods-available/sql //配置⽂件权限,将所属组更改为radiusd# systemctl restart radiusd.service //重启radius服务
5 添加客户端连接设置,添加允许所以⽤户接⼊
# vi /etc/raddb/clients.conf
添加如下内容
client all_client {ipaddr = 0.0.0.0/0secret = testing123require_message_authenticator = no}
七、安装FreeRadius管理界⾯Daloradius1 进⼊Apache⽹站根⽬录,下载源⽂件
# cd /var/www/html/# wget https://github.com/lirantal/daloradius/archive/master.zip 如出现 -bash: wget: command not found 等就安装相应软件,没出现忽略这步。# yum -y install wget# unzip master.zip //解压# rm -f master.zip # mv daloradius-master/ /var/www/html/daloradius //移动⽂件夹
2 设置DaloRadius⽬录权限及属主信息
# chown -R apache:apache /var/www/html/daloradius# mv /var/www/html/daloradius/library/daloradius.conf.php.sample /var/www/html/daloradius/library/daloradius.conf.php. //修改php.sample为php(这个好像跟版本有关系)# chmod -R 664 /var/www/html/daloradius/library/daloradius.conf.php
3 在MariaDB中创建DaloRadius数据对象
[root@localhost html]# mysql -u root -p radius < /var/www/html/daloradius/contrib/db/fr2-mysql-daloradius-and-freeradius.sql Enter password:[root@localhost html]# mysql -u root -p radius < /var/www/html/daloradius/contrib/db/mysql-daloradius.sql Enter password:[root@localhost html]#
4 修改DaloRadius配置⽂件
# vi /var/www/html/daloradius/library/daloradius.conf.php //使⽤VI编辑器修改DaloRadius配置⽂件
5 重启服务
# systemctl restart radiusd.service# systemctl restart mariadb.service# systemctl restart httpd
如果提示:Warning: radiusd.service changed on disk. Run 'systemctl daemon-reload' to reload units
没有上⾯提示就忽略此步
# systemctl daemon-reload
# systemctl restart radiusd.service
⼋ 、 安装php-pear# yum install -y php-pear-DB --skip-broken
九、登陆web⻚⾯默认⽤户名: administrator 密码: radius
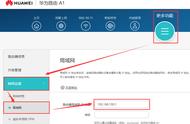
http://192.168.0.107/daloradius/login.php添加⽤户
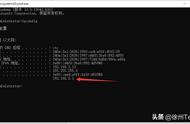
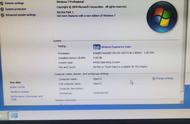
windows端测试
其它事项:在其安装过程中碰到,dologin.php 500 后查找发现为 php-pear-DB没有安装,安装后问题解决。
后查看php错误信息发现为
[root@localhost daloradius]# php dologin.phpPHP Notice: Undefined index: REMOTE_ADDR in /var/www/html/daloradius/dologin.php on line 27PHP Notice: Undefined index: location in /var/www/html/daloradius/dologin.php on line 45PHP Warning: include_once(DB.php): failed to open stream: No such file or directory in /var/www/html/daloradius/library/opendb.php on line 84PHP Warning: include_once(): Failed opening 'DB.php' for inclusion (include_path='.:/usr/share/pear:/usr/share/php') in /var/www/html/daloradius/library/opendb.php on line 84PHP Fatal error: Uncaught Error: Class 'DB' not found in /var/www/html/daloradius/library/opendb.php:86Stack trace:#0 /var/www/html/daloradius/dologin.php(49): include()#1 {main} thrown in /var/www/html/daloradius/library/opendb.php on line 86[root@localhost daloradius]#
cat /etc/httpd/logs/error_log # 查看 http 服务的⽇志,发现有以下错误:PHP Fatal error: Uncaught Error: Class 'DB' not found in /var/www/html/daloradius/library/opendb.php:86\nStack trace:\n#0 /var/www/html/daloradius/dologin.php(49): include()\n#1 {main}\n thrown in /var/www/html/daloradius/library/opendb.php on line 86解决⽅法:安装php-pear-DByum install -y php-pear-DB现在打开浏览器访问 http://your ip address//daloradius 就可以看到daloradius的界⾯了,默认登录的⽤户名和密码分别为 username: administrator password: radius
在其安装过程中碰到⽤户名密码正确被拒:解决三部曲
1 创建软连接
# ln -s /etc/raddb/mods-available/sql /etc/raddb/mods-enabled/ 为/etc/raddb/mods-enabled //创建软连接
2 将raad_clients打开 将client_table 打开
3 重读配置⽂件,重启radius服务
# systemctl daemon-reload# systemctl restart radiusd.service
参考资料:
https://www.cnblogs.com/opsprobe/p/9769555.html (解决了DB没装报错)
https://blog.csdn.net/qq_29056051/article/details/81066205(主要参考来源)
https://www.cnblogs.com/lamp01/p/10101659.html (解决php安装)
https://www.cnblogs.com/travis-li/p/12711355.html(解决Daloradius,以及FreeRadius安装)
,