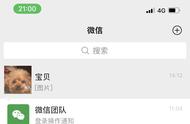
iOS 推送播放语音的需求调研,即收到推送后,播放推送的文案,文案的内容不固定。类似于支付宝和微信的收款到账语音。
- 只有iOS10以上才支持app被唤醒后在后台/锁屏状态下播放音频。所以iOS10以下的设备,在收到VoIP Push后只能在local push上设定一段固定铃声,这也是为什么iOS10以下只有“微信支付收款到账”。
- iOS 12.0之前,后台播放音频未被限制,直接使用Notification Service Extension (iOS 10.0以后才支持) 功能使用系统提供的功能AVSpeechSynthesizer即可。
- iOS 12.0之后,Notification Service Extension后台播放音频功能被限制,所以播放实现起来比较困难。
- 如果要上架商店,只有播放固定的音频,或固定拼接的音频,通过设置通知的声音或者发送本地通知设置本地通知的声音来播放。
- 如果无需上架商店,可以手动打开Notification Service Extension的后台播放。

项目添加了Notification Service Extension之后的逻辑,和没添加之前有所不同。如下图:添加了之后,接受到推送时,会触发Notification Service Extension中的方法,在这个方法中,可以修改推送的标题、内容、声音。然后把修改后的推送展示出来。
通知栏的生命周期:
- 从通知叮一下展示(触发代码:self.contentHandler(self.bestAttemptContent);)出来到通知被收起(系统控制),大概有6秒左右的时间。
- 如果收到通知后,没有呼出通知栏,最多30s系统会调用serviceExtensionTimeWillExpire方法中的self.contentHandler(self.bestAttemptContent)来呼出通知栏。
要注意的是,Notification Service Extension和主项目不是同一个Target,所以主项目的文件和这个Target文件是不共享的。
- 创建新文件的时候要注意勾选要添加到的Target
- 比如添加推送播放语音的类,需要勾选到Notification Service Extension Target下;
- 拷贝播放语音的第三方SDK,需要勾选到Notification Service Extension Target下;
- 在第三方平台创建新应用时,要填写的bundleID也应该是Notification Service Extension Target对应的bundleID。,这点尤其要注意,因为百度的测试账号离线SDK的添加只能添加一次,错了的话,就要用新的账号再去注册,血泪的教训,。
- bundle目录的访问也不是同一个,可以通过App Group共享数据。
- 打开后台播放时,其实也应该是Notification Service Extension Target下的后台播放,这个后面详细说明。
创建步骤如下:
- 创建Notificaiton Service Extension Target,选中Xcode项目,点击File -> New -> Target,选中Notification Service Extension Target。有两个很相似的,注意选对,如下图:

- 点击Next,输入Product Name

- 点击完成,点击Activate
- 打开NotificationService.m中的文件,这个类就是Notificaiton Service Extension添加后自动创建的类,添加了之后,接受到推送的处理都可以在这个位置修改
- 其中修改推送铃声时要注意:
- 多条推送处理的问题,在didReceiveNotificationRequest:withContentHandler:方法中调用self.contentHandler(self.bestAttemptContent);,即会展示对应的通知,如果不调用此方法,最多30s系统会自动调用此方法,假设一次性来了10条通知,会发现,通知并没有弹出10次,也没有按顺序一次次展示,所以多条推送如果没有处理,播放语音时就会出现问题。
- 语音的文件类型:自定义铃声支持的声音格式包括,aiff、wav以及wav格式,铃声的长度必须小于30s,否则系统会播放默认的铃声。
- 音频文件存储的目录和读取的优先级,主应用中的Library/Sounds文件夹中、AppGroups共享目录中的Library/Sounds文件夹中、main bundle
- 在系统播放类AVSpeechSynthesizer的代理方法中,有播放完成的回掉speechSynthesizer:didFinishSpeechUtterance:,把呼出通知栏的代码self.contentHandler(self.bestAttemptContent)从didReceiveNotificationRequest:withContentHandler:方法中,移到播放完成的回掉方法中调用,即可保证语音按顺序一条条展示。(或者添加到数组或着OperationQueue中,播放完成继续下一条)
- didReceiveNotificationRequest:withContentHandler:方法,其中的bestAttemptContent中的userInfo即包含了推送的详细信息。如果想要修改展示的标题和内容或者推送的语音,都在这个方法最后回掉前操作,
@interface NotificationService ()

@property (nonatomic, strong) void (^contentHandler)(UNNotificationContent *contentToDeliver);
@property (nonatomic, strong) UNMutableNotificationContent *bestAttemptContent;

@end

@implementation NotificationService

- (void)didReceiveNotificationRequest:(UNNotificationRequest *)request withContentHandler:(void (^)(UNNotificationContent * _Nonnull))contentHandler {
    self.contentHandler = contentHandler;
    self.bestAttemptContent = [request.content mutablecopy];

    // Modify the notification content here...
    // 修改推送的标题
    //    self.bestAttemptContent.title = [NSString stringWithFormat:@"%@ [modified]", self.bestAttemptContent.title];

    // 修改推送的声音,自定义铃声支持的声音格式包括,aiff、wav以及wav格式,铃声的长度必须小于30s,否则系统会播放默认的铃声。
    //    self.bestAttemptContent.sound = [UNNotificationSound soundNamed:@"a.wav"];

    // 播放处理
    [self playVoiceWithInfo:self.bestAttemptContent.userInfo];

    self.contentHandler(self.bestAttemptContent);
}

- (void)serviceExtensionTimeWillExpire {
    // Called just before the extension will be terminated by the system.
    // Use this as an opportunity to deliver your "best attempt" at modified content, otherwise the original push payload will be used.
    self.contentHandler(self.bestAttemptContent);
}

- (void)playVoiceWithInfo:(NSDictionary *)userInfo {
    NSLog(@"NotificationExtension content : %@",userInfo);

    NSString *title = userInfo[@"aps"][@"alert"][@"title"];
    NSString *subTitle = userInfo[@"aps"][@"alert"][@"subtitle"];
    NSString *subMessage = userInfo[@"aps"][@"alert"][@"body"];
    NSString *isRead = userInfo[@"isRead"];
    NSString *isUseBaiDu = userInfo[@"isBaiDu"];

    [[AVAudioSession sharedInstance] setCategory:AVAudioSessionCategoryPlayback
                                     withOptions:AVAudioSessionCategoryOptionDuckOthers error:nil];
    [[AVAudioSession sharedInstance] setActive:YES
                                   withOptions:AVAudioSessionSetActiveOptionNotifyOthersOnDeactivation
                                         error:nil];

    // Ps: 下面代码示例并没有多条播放的处理,还请注意

    if ([isRead isEqual:@"1"]) {
        // 播放语音
        if ([isUseBaiDu isEqual:@"1"]) {
            // 使用百度离线语音播放
            [[BaiDuTtsUtils shared] playBaiDuTTSVoiceWithContent:title];
        }
        else {
            // 使用系统语音播放
            [[AppleTtsUtils shared] playAppleTTSVoiceWithContent:title];
        }
    }
    else {
        // 无需播放语音
    }

}

@end
其中AppleTtsUtils中实现如下,大致就是使用AVSpeechSynthesizer直接播放,设置音量和语速,需要注意的是,
- 音量的设置
- 静音时是不会播放的
- 实际播放的音量大小=设置的音量大小*系统音量的大小。所以即使设置了大音量,但是系统音量很小,播放的声音也很小。(比如系统volume是0.5,AVAudioPlayer的音量是0.6,则最终的音量为0.5*0.6 =0.3)。解决方案是:最终的解决方案借鉴了进入收付款展示二维码时自动调节屏幕亮度的方案:如果屏幕亮度未达到阈值,则调高屏幕亮度到阈值,离开页面时,将亮度设回原亮度。同理,播放提示音时,若用户设置的系统音量小于阈值,则调节到阈值。提示音播放完毕后,将提示音调回原音量,大致意思是:
- 数字的处理
- 数字转语音,采用zh-CN的voice后,数字的播放方式是几万几千几百几十几这种,可采用数字后面拼接空格的方式来处理;遍历内容的每一个字符串,如果是数字,则拼接一个空格到后面,最后播放时数字就会一个个读出来。
#import "AppleTTSUtils.h"
#import <AVFoundation/AVFoundation.h>
#import <AVKit/AVKit.h>

@interface AppleTtsUtils ()<AVSpeechSynthesizerDelegate>

@property (nonatomic, strong) AVSpeechSynthesizer *speechSynthesizer;
@property (nonatomic, strong) AVSpeechSynthesisVoice *speechSynthesisVoice;

@end

@implementation AppleTtsUtils

  (instancetype)shared {
    static id instance = nil;
    static dispatch_once_t onceToken;
    dispatch_once(&onceToken, ^{
        instance = [[self class] new];
    });

    return instance;
}

- (BOOL)isNumber:(NSString *)str
{
   if (str.length == 0) {
        return NO;
    }
    NSString *regex = @"[0-9]*";
    NSPredicate *pred = [NSPredicate predicateWithFormat:@"SELF MATCHES %@",regex];
    if ([pred evaluateWithObject:str]) {
        return YES;
    }
    return NO;
}

- (void)playAppleTtsVoiceWithContent:(NSString *)content {

    if ((content == nil) || (content.length <= 0)) {
        return;
    }
    // 数字转语音,采用zh-CN的voice后,数字的播放方式是几万几千几百几十几这种,故而采用数字后面拼接空格的方式来处理;遍历内容的每一个字符串,如果是数字,则拼接一个空格到后面,最后播放时数字就会一个个读出来。
    NSString *newResult = @"";
    for (int i = 0; i < content.length; i  ) {
        NSString *tempStr = [content substringWithRange:NSMakeRange(i, 1)];
        newResult = [newResult stringByAppendingString:tempStr];
        if ([self deptNumInputShouldNumber:tempStr] ) {
            newResult = [newResult stringByAppendingString:@" "];
        }
    }
    // Todo: 英文转语音

    AVSpeechUtterance *utterance = [AVSpeechUtterance speechUtteranceWithString:newResult];
    utterance.rate = AVSpeechUtteranceDefaultSpeechRate;
    utterance.voice = self.speechSynthesisVoice;
    utterance.volume = 1.0;
    utterance.rate = AVSpeechUtteranceDefaultSpeechRate;
    [self.speechSynthesizer speakUtterance:utterance];
}

- (AVSpeechSynthesizer *)speechSynthesizer {
    if (!_speechSynthesizer) {
        _speechSynthesizer = [[AVSpeechSynthesizer alloc] init];
        _speechSynthesizer.delegate = self;
    }
    return _speechSynthesizer;
}

- (AVSpeechSynthesisVoice *)speechSynthesisVoice {
    if (!_speechSynthesisVoice) {
        _speechSynthesisVoice = [AVSpeechSynthesisVoice voiceWithLanguage:@"zh-CN"];
    }
    return _speechSynthesisVoice;
}


- (void)speechSynthesizer:(AVSpeechSynthesizer *)synthesizer didStartSpeechUtterance:(AVSpeechUtterance *)utterance {
    NSLog(@"didStartSpeechUtterance");
}

- (void)speechSynthesizer:(AVSpeechSynthesizer *)synthesizer didCancelSpeechUtterance:(AVSpeechUtterance *)utterance {
    NSLog(@"didCancelSpeechUtterance");
}

- (void)speechSynthesizer:(AVSpeechSynthesizer *)synthesizer didPauseSpeechUtterance:(AVSpeechUtterance *)utterance {
    NSLog(@"didPauseSpeechUtterance");
}

- (void)speechSynthesizer:(AVSpeechSynthesizer *)synthesizer didFinishSpeechUtterance:(AVSpeechUtterance *)utterance {
    NSLog(@"didFinishSpeechUtterance");
    [self.speechSynthesizer stopSpeakingAtBoundary:AVSpeechBoundaryWord];

//    // 每一条语音播放完成后,我们调用此代码,用来呼出通知栏
// 可通过Block回掉暴露给上层
//    self.contentHandler(self.bestAttemptContent);
}
b. 百度TTS离线SDK添加
- 打开百度智能控制台,选中应用列表,创建新的要测试的应用,创建后会有,这里bundleId要写创建的对应的Notification Service Extension的bundleId,而不是主项目的bundleId,一定要注意!!!如下图
- 左侧选中离线SDK管理,点击添加,然后选中刚刚创建的应用,点击完成后,点击下载序列号列表,然后把AppId、AppKey、SecretKey、以及序列号存储,用于初始化离线SDK。如下图
- 左侧选中离线SDK管理时,点击右边的下载SDK,以及开发文档,按照SDK的说法❝集成指南: 强烈建议用户首先运行SDK包中的Demo工程,Demo工程中详细说明了语音合成的使用方法,并提供了完整的示例。一般情况下,您只需参照demo工程即可完成所有的集成和配置工作。
- 所以,把SDK下载好了之后,打开BDSClientSample项目,然后把TTSViewController.mm文件中的APP_ID、API_KEY、SECRET_KEY和SN改为刚刚申请的,然后运行测试,看能否正常播放语音,播放成功说明申请的没有问题,就可以继续往项目中集成,要不然,集成到项目中发现不播放,会怀疑是SDK的问题。,以为集成后调试确实很容易让人怀疑人生。
- 把SDK解压后的BDSClientHeaders、BDSClientLib、BDSClientResource文件夹拖拽到Notification Service Extension的target下,注意勾选copy选项,然后把BDSClientLib文件夹下的.gitignore删除,要不然编译会失败,真的,不骗人,,踩坑指南
- 添加依赖的系统库,参考BDSClientSample项目中的依赖,注意添加到Notification Service Extension的target下,如下图:
- done,编译Notification Service Extension的target,注意选对target,噢噢,这个地方还有个问题,新创建的target是根据Xcode的版本来的,所以还需要修改一下这个target兼容的最低target,要不然默认可能是14.4,然后运行调试不报错,能正常运行,但是断点不走,惊不惊喜,。
- 添加百度语音处理代码到Notification Service Extension的target下,如上面写的,BaiDuTtsUtils代码如下
- 这里要注意的是, configureOfflineTTS方法中,offlineSpeechData和offlineTextData资源的加载,默认和Demo中写的一致即可,其实是BDSClientResource文件夹下TTS文件夹中的内容,如果下载的有别的语音文件,这里就加载自己下载的语音文件。
#import "BaiDuTtsUtils.h"
#import "BDSSpeechSynthesizer.h"

// 百度TTS
NSString* BaiDuTTSAPP_ID = @"Your_APP_ID";
NSString* BaiDuTTSAPI_KEY = @"Your_APP_KEY";
NSString* BaiDuTTSSECRET_KEY = @"Your_SECRET_KEY";
NSString* BaiDuTTSSN = @"Your_SN";

@interface BaiDuTtsUtils ()<BDSSpeechSynthesizerDelegate>

@end

@implementation BaiDuTtsUtils

  (instancetype)shared {
    static id instance = nil;
    static dispatch_once_t onceToken;
    dispatch_once(&onceToken, ^{
        instance = [[self class] new];
    });

    return instance;
}

#pragma mark - baidu tts

-(void)configureOfflineTTS{

    NSError *err = nil;
    NSString* offlineSpeechData = [[NSBundle mainBundle] pathForResource:@"bd_etts_common_speech_m15_mand_eng_high_am-mgc_v3.6.0_20190117" ofType:@"dat"];
    NSString* offlineTextData = [[NSBundle mainBundle] pathForResource:@"bd_etts_common_text_txt_all_mand_eng_middle_big_v3.4.2_20210319" ofType:@"dat"];
//    #error "set offline engine license"
    if (offlineSpeechData == nil || offlineTextData == nil) {
        NSLog(@"离线合成 资源文件为空!");
        return;
    }

    err = [[BDSSpeechSynthesizer sharedInstance] loadOfflineEngine:offlineTextData speechDataPath:offlineSpeechData licenseFilePath:nil withAppCode:BaiDuTTSAPP_ID withSn:BaiDuTTSSN];
    if(err){
        NSLog(@"Offline TTS init failed");
        return;
    }
}

- (void)playBaiDuTTSVoiceWithContent:(NSString *)voiceText {
    NSLog(@"TTS version info: %@", [BDSSpeechSynthesizer version]);

    [BDSSpeechSynthesizer setLogLevel:BDS_PUBLIC_LOG_VERBOSE];
    // 设置委托对象
    [[BDSSpeechSynthesizer sharedInstance] setSynthesizerDelegate:self];


    [self configureOfflineTTS];

    [[BDSSpeechSynthesizer sharedInstance] setPlayerVolume:10];
    [[BDSSpeechSynthesizer sharedInstance] setSynthParam:[NSNumber numberWithInteger:5] forKey:BDS_SYNTHESIZER_PARAM_SPEED];

    // 开始合成并播放
    NSError* speakError = nil;
    NSInteger sentenceID = [[BDSSpeechSynthesizer sharedInstance] speakSentence:voiceText withError:&speakError];
    if (speakError) {
        NSLog(@"错误: %ld, %@", (long)speakError.code, speakError.localizedDescription);
    }
}

- (void)synthesizerStartWorkingSentence:(NSInteger)SynthesizeSentence
{
    NSLog(@"Began synthesizing sentence %ld", (long)SynthesizeSentence);
}

- (void)synthesizerFinishWorkingSentence:(NSInteger)SynthesizeSentence
{
    NSLog(@"Finished synthesizing sentence %ld", (long)SynthesizeSentence);
}

- (void)synthesizerSpeechStartSentence:(NSInteger)SpeakSentence
{
    NSLog(@"Began playing sentence %ld", (long)SpeakSentence);
}

- (void)synthesizerSpeechEndSentence:(NSInteger)SpeakSentence
{
    NSLog(@"Finished playing sentence %ld", (long)SpeakSentence);
}


@end
c. 调试
刺激的部分来了,上面都编译通过了没问题,使用推送调试,先运行一次主项目,然后选中Notification Service Extension Target运行,didReceiveNotificationRequest:withContentHandler:方法中添加断点,,给自己推送消息,会发现断点走到了这里,说明target的创建没有问题。
然后控制推送参数的,isRead和isBaiDu参数,决定推送过来的语音是否走百度的语音播放。噢,说到推送参数,这个地方还需要在payload推送参数中添加"mutable-content = 1"字段,eg:
{
  "aps": {
  "alert": {
      "title":"标题",
      "subtitle: "副标题",
      "body": "内容"
  },
  "badge": 1,
  "sound": "default",
  "mutable-content": "1",
  }
}
推送调试,会发现运行正常,但是语音没有播放,不管是系统的还是百度的,哈哈哈,崩溃不。仔细看控制台,会发现,报错如下
Ps: iOS 12.0之后,在Notification Service Extension调用系统播放AVSpeechSynthesizer时报的错误。
[AXTTSCommon] Failure starting audio queue alp!
[AXTTSCommon] _BeginSpeaking: couldn't begin playback
Ps: iOS 12.0之后,在Notification Service Extension调用百度的SDK直接播放时报的错误。
[ERROR][AudioBufPlayer.mm:1088]AudioQueue start errored error: 561015905 (!pla)
[ERROR][AudioBufPlayer.mm:1099]Can't begin playback while in background!
都是一个意思,即不能在后台播放音频。怎么解决呢,当然是添加backgroundMode字段了,打开主工程的Signing&Capabilities,添加backgrondModes,勾选Audio, Airplay, and Picture in Picture,如下图


OK,try again! 再次推送,会发现————还是不行,同样的报错,哈哈哈,绝望不,不好意思,我收敛一下,这个地方其实添加的没错,只不过要注意
❝在Notification Service Extension配置了之后,发现收到通知后还是不会播放声音,在这个Extension的Target下打开plist,添加Required background modes字段,里面item0写上App plays audio or streams audio/video using AirPlay后,再次调试,发现百度的语音即可播放。这种方式审核时不被通过,因为这个Extension的target其实是没有backgroundMode的设置的,从Signing&Capabilities中可以看出,直接添加backgroundMode是没有的。故而如果不是上线到苹果商店的,只是公司内部分发,可以用这种方式。
添加了之后,再次推送,就会发现百度的语音就可以播放了,而且数字和英文、中文播放都十分完美,除了价格有些感人,其他的没毛病。而系统的播放语音,如果先推送系统的,会发现不能播放,还是同样的报错;但是如果先推送了走百度的,百度播放了之后,再推送系统的,就会发现系统的也能播报,但是系统播报的英文和数字会有问题,记得处理,可以听一下英文字母E的发音,发音额。。。解决方案——暂无,还没找到,建议走第三方合成的语音。
由于项目不需要上线商店,所以到这里其实就结束了。但是对于上线到商店到应用来说,这种处理方法是不行的,上线到商店的应用其实只有播放固定格式的音频一种解决方法,即替换推送的声音。使用固定格式的音频、或者固定格式的合成音频替换掉推送的声音,或者采用远程推送静音,发送多个本地通知,各个本地通知的声音替换掉这种方法。这些是从末尾的参考中得到的启示。
三、结论直接上图,整理后的思维导图如下,大部分比较复杂的处理逻辑其实是iOS 12.0之后的处理。

- iOS 语音播报解决方案(实现支付宝/微信语音收款提示功能)
- iOS极光推送 语音播报(支付宝收款播报)
- 百度离线合成iOS-SDK集成文档
- 百度智能控制台
- iOS12.1之后语音播报问题解决,以及对Notification Service Extension的一些探索
- iOS12.1使用百度语音无法播报
- 微信iOS收款到账语音提醒开发总结
- iOS13微信收款到账语音提醒开发总结
作者:王徳亮
来源:微信公众号:搜狐技术产品
出处:https://mp.weixin.qq.com/s/Gpu4sw0Zn4IBS-k5wvF__g
,