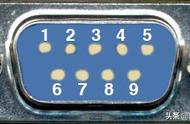
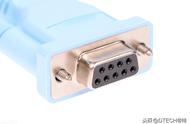
先来看看运行结果:

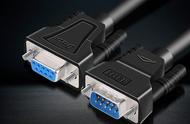
最近在研究串口通讯,其中有几个比较重要的概念,RS-232这种适配于上位机和PC端进行连接,RS-232只限于PC串口和设备间点对点的通信。它很简单的就可以进行连接,由于串口通讯是异步的,也就是说你可以同时向两端或者更多进行数据发送,它们之间的传输数据类型是byte,串口通信最重要的参数是波特率、数据位、停止位和奇偶校验。对于两个进行通信的端口,这些参数必须匹配。接下来先解释一下几个关于串口通讯的术语:
第一个波特率,这个东西在不同领域都有涉及,在串口通讯中两个串口之间通讯之间的信号单元叫做码元,每分钟传递的信号(码元)也就是波特率;
第二个数据位、停止位:这个听名字就知道是啥意思了,在传递数据过程之前,机器会识别你的数据是个啥,然后根据这个类型,去调整不同的起始位、停止位。
第三个奇偶校验:就是想知道你这个数据有多大,多长,因为传输都是1 和 0 ,具体校验方法如下:
二、串口模拟工具免费下载奇校验:就是让原有数据序列中(包括你要加上的一位)1的个数为奇数 ---- 1000110(0)你必须添0这样原来有3个1已经是奇数了所以你添上0之后1的个数还是奇数个。
偶校验:就是让原有数据序列中(包括你要加上的一位)1的个数为偶数 ---- 1000110(1)你就必须加1了这样原来有3个1要想1的个数为偶数就只能添1了。
如果想要在C#中玩转串口通讯或者模拟串口,你必须先搞个硬件,当然我们是在模拟,那你就弄个模拟的工具呗,这个我给大家准备好了,自己去下载吧!
【下载地址见文末】
【下载地址见文末】
【下载地址见文末】
安装好了之后,桌面会有图标,然后打开,添加一个串口,具体请看下图:

下面我们就开始代码的实现了,创建一个.NET Fwk的 Winform 项目,然后开始我们的代码:
SerialPort sp1 = new SerialPort();
public Form1()
        {
            InitializeComponent();
        }


private void Form1_Load(object sender, EventArgs e)
        {
string[] strCom = SerialPort.GetPortNames();
if (strCom == null)
            {
                MessageBox.Show("本机没有串口!", "Error");
return;
            }
foreach (string com in System.IO.Ports.SerialPort.GetPortNames())
            {
                cbCom.Items.Add(com);
            }
            cbCom.SelectedIndex = 0;
            sp1.BaudRate = 9600;
            Control.CheckForIllegalCrossThreadCalls = false;
            sp1.DataReceived  = Sp1_DataReceived;


            sp1.DtrEnable = true;
            sp1.RtsEnable = true;
            sp1.ReadTimeout = 1000;
            sp1.Close();
        }
在窗体加载中,我们尝试获取了本机的所有串口,通过 SerialPort.GetPortNames() 方法,会返回一个字符串数组,如果没有就返回null,在其中,我们还设置了波特率,通过SerialPort类下的 DataReceived 方法,来监听我们的数据回传,还启用了DTR\DTS请求方式,通过 ReadTimeOut 对数据读取超时进行了控制。
既然我们监听了数据回传,那么在这个方法中,通过 ReadTimeOut.Read 进行了读取,直接从0到最后,截取完毕。
private void Sp1_DataReceived(object sender, SerialDataReceivedEventArgs e)
        {
if (sp1.IsOpen)     //判断是否打开串口
            {
//输出当前时间
                DateTime dt = DateTime.Now;
                txtReceived.Text  = dt.GetDateTimeFormats('f')[0].ToString()   "\r\n";
                Byte[] receivedData = new Byte[sp1.BytesToRead];        //创建接收字节数组
                sp1.Read(receivedData, 0, receivedData.Length);         //读取数据
                AddContent(new UTF8Encoding().GetString(receivedData));
            }
else
            {
                MessageBox.Show("请打开某个串口", "错误提示");
            }
        }


private void AddContent(string v)
        {
this.BeginInvoke(new MethodInvoker(delegate
            {
                txtReceived.AppendText(v);
                txtReceived.AppendText("\r\n");
            }));
        }
当然以上的操作都必须在打开串口之后才能进行,打开串口这个还是比较费劲的,因为要设置各种参数,也就是我刚才说的那几个概念,如果不对,你让其他的端口来访问就找不到了。
private void button2_Click(object sender, EventArgs e)
        {
if (!sp1.IsOpen)
            {
try
                {
string serialName = cbCom.SelectedItem.ToString();
                    sp1.PortName = serialName;
string strBaudRate = cbBaudRate.Text;
string strDateBits = cbDataBits.Text;
string strStopBits = cbStop.Text;
                    Int32 iBaudRate = Convert.ToInt32(strBaudRate);
                    Int32 iDateBits = Convert.ToInt32(strDateBits);
                    sp1.BaudRate = iBaudRate;       //波特率
                    sp1.DataBits = iDateBits;       //数据位
switch (cbStop.Text)            //停止位
                    {
case "1":
                            sp1.StopBits = StopBits.One;
break;
case "1.5":
                            sp1.StopBits = StopBits.OnePointFive;
break;
case "2":
                            sp1.StopBits = StopBits.Two;
break;
default:
                            MessageBox.Show("Error:参数不正确!", "Error");
break;
                    }
switch (cbCheck.Text)             //校验位
                    {
case "无":
                            sp1.Parity = Parity.None;
break;
case "奇校验":
                            sp1.Parity = Parity.Odd;
break;
case "偶校验":
                            sp1.Parity = Parity.Even;
break;
default:
                            MessageBox.Show("Error:参数不正确!", "Error");
break;
                    }


if (sp1.IsOpen == true)
                    {
                        sp1.Close();
                    }


//设置必要控件不可用
                    cbCom.Enabled = false;
                    cbBaudRate.Enabled = false;
                    cbDataBits.Enabled = false;
                    cbStop.Enabled = false;
                    cbCheck.Enabled = false;
                    sp1.Open();     //打开串口
                    button2.Text = "关闭串口";
                }
catch (System.Exception ex)
                {
                    MessageBox.Show("Error:"   ex.Message, "Error");
return;
                }
            }
else
            {
                cbCom.Enabled = true;
                cbBaudRate.Enabled = true;
                cbDataBits.Enabled = true;
                cbStop.Enabled = true;
                cbCheck.Enabled = true;
                sp1.Close();                    //关闭串口
                button2.Text = "打开串口";
            }
        }
最后也就是发送了,刚才我们接收使用Read,发送也当然很简单,是Write...
private void button1_Click(object sender, EventArgs e)
        {
byte[] sendData = null;
if (!sp1.IsOpen) //如果没打开
            {
                MessageBox.Show("请先打开串口!", "Error");
return;
            }
            String strSend = txtSendStr.Text;
try
            {
                sendData = Encoding.UTF8.GetBytes(txtSendStr.Text.Trim());
                sp1.Write(sendData, 0, sendData.Length);
            }
catch (Exception ex)
            {
                MessageBox.Show("Error:"   ex.Message, "Error");
            }


        }
四、串口通讯实例免费下载
【下载地址见文末】
【下载地址见文末】
【下载地址见文末】

